
News
Matte or Gloss? The Texture-First Guide to Lipsticks That Fit Your Life
Sep
Part I — Decoding Texture
If color is the message, texture is the tone of voice. A classic blue-red can whisper or command depending on whether it’s cushioned in gloss, balanced in satin, or sharpened into modern matte. Master texture, and you double (or triple) the mileage of every shade you own. This chapter is your texture field guide—what each finish really looks and feels like, why it behaves the way it does, how it photographs, and the simple techniques that make each one sing on your lips.
1) Matte (the modern velvet, not the chalkboard of yesteryear)
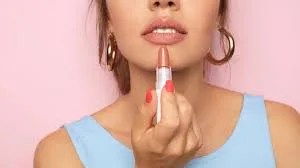
How it looks: Light-absorbing, photographically crisp, with edges that seem to draw themselves. Matte makes color read purer and shapes read cleaner. In person, it looks “finished” without sparkle or glare; on camera, it translates as clarity.
How it should feel: Airy and flexible. A good matte glides, sets, and then moves with your mouth without cracking. It shouldn’t feel tight by hour three, nor leave your lips looking powdered.
Why it behaves this way: Today’s mattes rely on a balanced network of high-load pigments embedded in elastomer gels and soft-focus powders (silica, silica-treated mica) along with lightweight esters. The powders cancel surface shine, the elastomers add bend, and volatile carriers flash off to leave a thin, even film. Film formers contribute to long wear, but the best mattes keep them flexible so the film doesn’t fracture.
When to choose it: Presentations, photos, long days, black tailoring, any time you want discipline and staying power. Matte reads editorial with crisp liner, effortless with blurred edges, and powerful paired with a structured outfit.
Pitfalls and quick fixes:
Emphasized flakes → apply a thin balm 10 minutes before, blot completely, then color in two whisper-thin coats with a blot between.
Heavy or flat look → soften the perimeter with a fingertip; a “clouded” edge modernizes matte instantly.
Central fade after meals → lightly fill the lip with a matching liner first, then layer.
Photographic behavior: Under strong LEDs, matte remains legible and avoids hotspot glare. Under flash, ensure the shade isn’t too deep for your skin depth or it may photograph almost black; if that happens, step one value lighter or add a hint of satin to the center.
2) Satin (the diplomat that flatters almost everyone)
How it looks: A gentle sheen that mimics natural skin moisture, giving lips dimension without obvious shine. It softens lines and reads luxurious up close.
How it should feel: Cushioned, creamy, never sticky. The film remains comfortable through conversations and touch-ups; one napkin blot reduces sheen without killing the look.
Why it behaves this way: Satins balance emollients (esters, lightweight oils), small amounts of wax for structure, and optical diffusers. The emollients keep glide high; the diffusers blur texture. Because satins use less volatile carrier than mattes, they remain a touch more mobile—hence the comfort.
When to choose it: Everyday polish, offices, dinners, weddings, any context with mixed lighting. Satin is the safest single finish for a capsule because it’s believable—your lips, elevated.
Pitfalls and quick fixes:
Feathering on mature or very mobile lips → lay down a clear barrier pencil or a nearly invisible liner first.
Too shiny in bright sun → press once with tissue; you’ll land in a satin-stain sweet spot.
Transfers to cups → thin layers, blot, reapply; consider setting through a single-ply tissue for special events.
Photographic behavior: In diffuse daylight, satin looks expensive. Under flash, it remains dimensional without glare spikes. On webcam, it tends to read true; if it looks too glossy, blot once and add definition with liner.
3) Cream (comfort-first color, a bit richer than satin)
How it looks: Opaque in one or two swipes with a soft, creamy shine. The mouth looks plush; micro-lines blur easily.
How it should feel: Cocooning—more emollient than satin. If your lips are prone to dryness, cream is the finish that forgives.
Why it behaves this way: Creams lean into higher oil/ester content, more butters (shea, cupuaçu), and lower powder loads. The trade-off is slightly more transfer, but the payoff is hydration and an easy retouch.
When to choose it: Low-maintenance days, dry climates, flights, and any time you want comfort to be the headline. Cream also flatters paler nudes that might look chalky in matte.
Pitfalls and quick fixes:
Slippage on the inner rim → apply less product there; press lips together to distribute; set lightly through tissue before a long event.
Over-glossy on camera → sheer with fingertip to convert to a cream-stain.
Bleeding into fine lines → pair with a barrier pencil or micro-concealer ring set with translucent powder.
Photographic behavior: Cream’s soft highlight can enlarge the lip beautifully in portraits; reduce hotspots with a single blot for video calls.
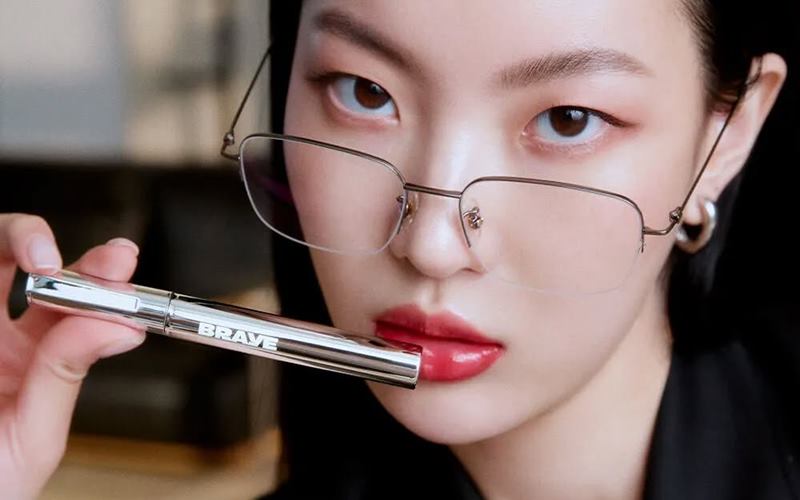
4) Gloss (from glassy lacquer to cushion oil)
How it looks: High reflection; light scatters and softens edges, making lips appear fuller. A clear or lightly tinted gloss can revive any day lipstick into a night look in five seconds.
How it should feel: Slick, bouncy, never stringy. Modern cushions blend oils with gel networks to prevent the hair-to-lip magnet effect.
Why it behaves this way: Glosses suspend low-to-mid pigment in a viscous oil-gel matrix (often hydrogenated polyisobutene or similar) that holds shine. Some include film formers for cling; plumping versions add humectants that attract water at the surface.
When to choose it: Casual afternoons, pared-back makeup, offsetting strong matte skin or graphic liner. Gloss adds life to muted wardrobes and instantly freshens a face after hours at a desk.
Pitfalls and quick fixes:
Migration past the border → use a clear wax pencil just outside the lip line.
Gloopy feel → apply in micro-doses: dab center-only, press, then add more if needed.
Short wear → layer over a stain or a full liner fill to leave color behind when the shine fades.
Photographic behavior: In still photos, gloss can create beautiful specular highlights; in webcam lighting it can flare. For calls, keep gloss centered and minimal or switch to satin.
5) Balm (tint, therapy, and the “no-makeup makeup” ally)
How it looks: Sheer to softly tinted with a dewy, hydrated finish that looks like your lips just drank water. It smooths vertical lines without the structure of lipstick.
How it should feel: Emollient, protective, never waxy or gritty. You should forget it’s there.
Why it behaves this way: Balms emphasize occlusives (like hydrogenated oils, plant waxes) and humectants (glycerin, hyaluronic derivatives) with minimal pigment. Tinted versions use lower-load dyes to avoid patchiness.
When to choose it: Off-duty, errand runs, lip recovery days, or as a base under matte (applied early and blotted before color). Balms also make “undone” looks feel intentional.
Pitfalls and quick fixes:
Too shiny for your taste → blot once; you’ll keep slip without obvious sheen.
Color clings to dry patches → smooth with a warm, damp cloth first; skip gritty scrubs on sensitized lips.
SPF flashback in photos → if your balm includes mineral SPF and you’ll be photographed with flash, layer a tinted stain on top.
Photographic behavior: Balms look like healthy skin. If they disappear on camera, add a touch more tint or choose a satin MLBB.
6) Stain (blurred, lived-in color that survives real life)
How it looks: Diffused pigment that seems part of your lip rather than sitting on top. Edges are soft; the vibe is effortless.
How it should feel: Barely there. A good stain leaves a flexible, thin layer of dye or finely milled pigment.
Why it behaves this way: Stains often use soluble dyes (for water-based tints) or ultra-thin pigments in volatile carriers (for oil-in-silicone tints). As the carrier evaporates, color remains. You can also DIY a stain from any bullet: apply, blot hard, press with fingertip, repeat.
When to choose it: Long days, warm weather, masks, or moments when you want color presence with zero maintenance.
Pitfalls and quick fixes:
Patchy dry-down → work quickly, blending as the carrier flashes; prep with a whisper of balm earlier in your routine and blot before the stain.
Too sheer → layer; stains reward patience.
Too cool/warm after set → adjust with liner underneath (mauve to cool, peach to warm).
Photographic behavior: Stains hold hue under harsh light and look believable on camera. They can appear subtle; add a touch of satin in the center if you want more dimension.
7) Hybrid and specialty textures (blur sticks, lip oils, lacquer)
Blur sticks: Soft-focus, mousse-matte creams that apply like a cloud and set to a diffused finish. Ideal for gradient looks and comfortable mattes on drier lips.
Lip oils: Sheer tints in high-slip oils that leave a slight stain as shine wears off. Great for minimalists; layer over liner for definition.
Lacquers: High-shine, high-pigment gloss-lipstick hybrids. They photograph dramatic; control with thin layers and tidy edges.
Metallics/pearls: Micro-shimmer creates volume; reserve for evening or tap just the bow and center to avoid frostiness.
8) Texture × Undertone × Depth — why the same shade reads different
Finish changes how your undertone and natural lip depth show through:
On deeply pigmented lips, sheer glosses and balms shift toward your natural color; to preserve the tube shade, choose cream/satin with higher opacity or lay a neutralizing liner first.
On very fair lips, mattes can look starker; blurring the edge or choosing satin softens the transition.
If your skin has cool undertones, high-shine oranges can warm teeth; soft satin or a cooler liner base keeps balance. If you’re warm, ultra-blue berries may look abrupt—nudge toward neutral with a peach liner beneath.
Remember, the human eye reads contrast first. Matte increases shape contrast; gloss decreases edge contrast and increases volume contrast (light bounce). Use that to your advantage.
9) Lighting literacy — the hidden variable that changes everything
Indirect daylight: the truth teller. Swatch here when deciding.
Office LEDs: cool and flattening; matte looks disciplined, satin may need a tiny chroma bump to avoid dullness.
Warm restaurant lighting/tungsten: warms colors; blue-reds mellow, corals glow; gloss sparkles but can look oily if over-applied.
Flash photography: boosts sheen and deepens shadows; very pale creams can wash out, ultra-deeps can block up—aim for mid-value satins or crisp mattes.
Webcam/phone video: compresses detail and lifts saturation unpredictably; prefer matte/satin edges for definition and keep gloss center-only.
If you must pick one finish for a full day across mixed light, choose satin and carry a tissue (to blot into stain) plus a mini gloss (to elevate for night).
10) Application blueprints by texture
Matte blueprint:
Condition early, blot; 2) invisible liner barrier if prone to feathering; 3) thin coat, blot, second thin coat; 4) optional—powder through tissue for event-proofing. Edge can be crisp or clouded.
Satin blueprint:
Trace corners with near-invisible liner; 2) one smooth coat; 3) press lips together and refine Cupid’s bow with the bullet tip; 4) single blot if needed.
Cream blueprint:
Minimal balm or none; 2) apply sparingly—a little travels far; 3) optional tissue set; 4) carry for touch-ups.
Gloss blueprint:
Build on a stain or liner base; 2) apply center-only and press to spread; 3) add more only if needed; 4) clear barrier for feather-prone lips.
Balm blueprint:
Exfoliate gently 2–3×/week; 2) apply and let settle; 3) for tint, layer to desired depth; 4) top with a touch of satin if you want more shape.
Stain blueprint:
Work fast; 2) paint and immediately diffuse with fingertip; 3) layer once dry; 4) lock edges with invisible liner if you want longevity without a line.
11) Comfort science — why some finishes feel better
Discomfort usually comes from film rigidity, volatile overload, or moisture imbalance.
Rigidity: Too much hard wax or brittle film formers crack when you smile. Look for “flexible film” language or elastomer gels that bend.
Volatiles: These help set, but an aggressive load can strip moisture. A balanced matte will pair volatiles with non-greasy emollients.
Moisture balance: Humectants pull water; occlusives trap it. Satins/creams often balance both. If you’re very dry, prep with a humectant-rich balm early, then blot to leave a comfortable cushion.
If fragrance or certain dyes tingle unpleasantly, patch-test. Comfort equals confidence; the most beautiful finish fails if it distracts you.
12) Choosing texture by context (the quick map)
Work / Presentations: Matte (architectural) or satin (credible).
Date night / Restaurants: Satin or lacquered gloss (dim light loves reflection).
All-day errands / Heat: Stain or modern matte (low maintenance).
Cameras / Panels: Matte or mid-value satin with defined edges.
Recovery days / Sensitive lips: Balm or creamy satin, blurred.
Outdoor brunch / Sun: Coral stain or gloss-oil; remember SPF on/around lips.
If you can pack only one, take a satin MLBB and a clear topper: blot to a stain for day, add shine for night.
13) Texture mixing — turn one bullet into three looks
Matte → Satin: press a fingertip coated with a touch of balm over the lip; you’ll add soft sheen without full gloss.
Satin → Stain: blot thoroughly, then press remaining pigment in with warm fingers.
Cream → “Cloud” Matte: apply, then tap a rice-grain of translucent powder onto the center through tissue; edges stay soft, center mattifies for wear.
Gloss → Plush but Precise: define with liner first; keep gloss dead-center and Cupid’s bow only.
This is how a tight capsule keeps up with a busy life.
14) Troubleshooting by finish (find-and-fix table)
Matte looks chalky: value too light; go deeper or add a peach/mauve liner base to neutralize.
Satin feathers: clear barrier pencil, thinner layers, or micro-concealer ring set with powder.
Cream slips: skip balm; apply to dry lips; tissue set through a single ply.
Gloss overwhelms: reduce quantity; center-only; choose cushion formulas not glass-lacquer.
Balm disappears: layer a tint first; reapply post-coffee; choose balms with gel networks for cling.
Stain turns patchy: prep earlier, blend faster, layer once dry; consider a lip-tone-matching liner as an underlay.
15) Texture and identity — using finish to say what you mean
Finish is a fast mood switch:
Decisive: modern matte with crisp edges.
Approachable: satin MLBB with softened perimeter.
Playful: juicy gloss over a coral stain.
Romantic: rosy satin with micro-gloss on the bow.
Artsy: blurred brick stain, no hard lines.
Minimalist: cream-nude tapped in with a fingertip, edges diffused.
Name the mood first, then pick the finish; the shade can follow.
16) Building a texture-smart capsule (sneak preview of Part III)
For maximum versatility with minimum bulk, anchor your kit with:
1 modern matte in your statement family (red/berry/brick),
1 satin MLBB that flatters your undertone,
1 cream comfort shade for dry days,
1 stain approach (bullet-to-stain or dedicated tint),
1 clear topper (gloss/balm) to pivot looks.
With those five textures, every shade in your drawer becomes three looks: work, weekend, and evening—no extra purchases required.
Part II — Texture by Need: Match the Moment, Not the Myth
Texture is the quickest way to translate intent into impact. You can keep the same shade and still change the “read” of your look simply by swapping finishes or layering them differently. Below is a practical, context-first guide: pick your moment, your constraints (light, comfort, longevity), and let texture do the heavy lifting.
1) Workdays & Presentations: credible, crisp, low-maintenance
Best textures: modern matte or balanced satin.
Why matte works: It absorbs light, keeps edges legible under harsh office LEDs, and resists transfer on coffee cups. Choose flexible mattes that feel cushiony, not chalky.
Why satin works: It mimics healthy skin moisture—neither glossy nor flat—so you look awake and trustworthy.
How to wear: Trace corners with a near-invisible liner (one tone deeper than your lip) for structure. For all-day schedules, use thin layers: one swipe, blot, second whisper-thin coat.
If you speak on camera: Matte/satin with clean edges. Keep gloss center-only or skip it to avoid glare.
2) Long Days, Little Time: stamina without sacrifice
Best textures: stain or modern matte.
Stain advantage: It fuses with your lips and fades gracefully, leaving color even after lunch.
Matte advantage: Thin layers plus a liner base hang on through meetings and masks.
Quick routine: In the morning, apply your bullet, blot firmly, press with fingertip to “lock” pigment—instant DIY stain. Carry a clear balm to refresh comfort at 3 p.m. without moving color.
3) Date Night & Dinners: soft edges that catch the light
Best textures: satin or cushion-gloss over a stain.
Satin in warm light: Candlelight warms hues; satin keeps dimension without slipping.
Gloss as accent: Tap on Cupid’s bow and center only; you’ll get plush volume without migrating to the lip line.
Pro tip: Build a stain first (blotted bullet or tint), then add a micro-dose of gloss. When shine wears off, you still have color.
4) Outdoor Brunch & Sunlit Errands: effortless and fresh
Best textures: gloss-oil or coral/rose stain.
Why: Daylight reveals everything; sheers and stains read believable and youthful.
Comfort guardrails: Use SPF around the mouth. If wind or AC dehydrates lips, keep a balm-gloss hybrid for slip that won’t gum up.
5) Interviews, Panels & High-Stakes Rooms: clarity over drama
Best textures: modern matte (structured) or mid-value satin (balanced).
Shade can be soft; texture is the message. A matte MLBB says “precise” without shouting; a satin rose says “reliable and present.”
Avoid: glassy gloss (distracting reflections) and ultra-pale nudes (washout under LEDs).
Edge strategy: Crisp edges read intentional; blurred edges can look too casual in formal contexts.
6) Sensitive Lips & Recovery Days: feel-good first
Best textures: balm, cream, or satin, edges softened.
Why: Comfort begets confidence. Creams and satins cushion texture; balm tints keep you polished while you heal.
How to wear: Exfoliate with a warm, damp cloth (not gritty scrubs) 2–3×/week, apply humectant-rich balm early, blot before color, and avoid rigid mattes until lips are smooth again.
7) Photos, Flash & Video: definition that survives compression
Best textures: matte or mid-value satin.
On camera: Gloss flares; ultra-deep shades can block up; very pale creams can vanish.
Recipe: Matte or satin with defined edges + a touch more chroma than you think—cameras lift brightness differently than mirrors.
If you want dimension: Tap a hair of satin at the center over matte; skip full-lip gloss.
8) Mixing Textures to Multiply Looks
You can turn one bullet into a day-to-night wardrobe with two small helpers: neutral liner and clear topper.
Matte → satin: Press a fingertip kissed with balm over lips for a gentle sheeny veil.
Satin → stain: Blot through tissue and massage remaining pigment in with fingers.
Cream → “cloud” matte: Apply lightly, then tap translucent powder through a single-ply tissue on the center only.
Gloss with precision: Define with liner first; keep shine to the bow and center.
9) Decision Matrix (10 seconds, anywhere)
Ask yourself:
Where am I going? (office / outdoor / warm evening / camera)
How do I want to feel? (lead / connect / play / magnetize / recover)
How much upkeep can I handle? (none / light / full)
What’s the light like? (LEDs / daylight / candlelight / flash)
Translate:
Office + lead + low upkeep + LEDs → matte or satin with crisp edges.
Outdoor + play + none + daylight → stain or gloss-oil.
Warm evening + magnetize + light upkeep + candlelight → satin over a stain, micro-gloss center.
Camera + clarity + light upkeep + flash → mid-value satin or matte, liner for definition.
10) Texture by Outfit & Eye Makeup (balancing acts)
Strong eyes (liner, shimmer, big lashes) → choose satin/cream or a gloss accent; let the eyes lead.
Minimal eyes → you have bandwidth for matte red, berry, or brick.
Matte outfit textures (wool, tweed, suiting) → gloss or satin adds life.
Slick fabrics (silk, patent, sequins) → matte steadies the look so it feels curated, not chaotic.

11) Quick Fixes for Real-Life Problems
Feathering: Clear barrier pencil just outside the lip line; or a micro ring of concealer set with powder.
Central fade: Fill the whole lip with liner first; apply color in thin layers with a blot.
Chalky nudes: Go one value deeper and one temperature warmer; cream or satin often beats matte here.
Too bold in the moment: Blot twice, tap balm, and blur edges—instant downgrade without starting over.
Gloss that won’t behave: Switch to cushion formulas; apply center-only; wipe the wand before reinserting to keep tubes clean.
12) Build a Texture-Smart Mini Capsule (fits a small pouch)
Satin MLBB: the universal translator; blot to stain for day, add topper for night.
Modern matte statement: red/berry/brick in your best family for structure on demand.
Cream comfort shade: a lip-kind option for flights and dry office air.
Clear topper: converts anything; center application only.
Neutral liner: one tone deeper than your lip; architecture without a visible outline.
With these five pieces, you can serve any context without lugging a makeup bag.
13) Seasonal Tweaks Without Re-buying
Summer: swap frequent gloss for stain; humidity and wind make gloss migrate.
Winter: lean into cream and satin; prep earlier, blot before color, reapply thinly.
Transitional months: keep the same shades and change finishes—matte in September becomes satin in April with the same bullet + topper trick.
14) Comfort Science, Simplified
If a finish feels off, the culprit is usually rigid film (too much hard wax), volatile overload (dry feel), or moisture mismatch (too occlusive or too humid).
Fix rigidity: Choose elastic mattes; apply in thinner coats.
Fix dryness: Prep with humectant balm early, blot, then apply.
Fix slip: Skip balm at the edges; set through tissue; favor satins over creams.
15) Identity in Motion: let finish carry the mood
You don’t need a new shade to say something new.
Decide, not debate: matte.
Warmth and welcome: satin.
Ease and joy: gloss or stain.
Care and recovery: balm or creamy satin.
Give yourself permission to change finishes as your day changes. That’s the fastest, most cost-effective way to keep your look fluent—without buying another tube.